
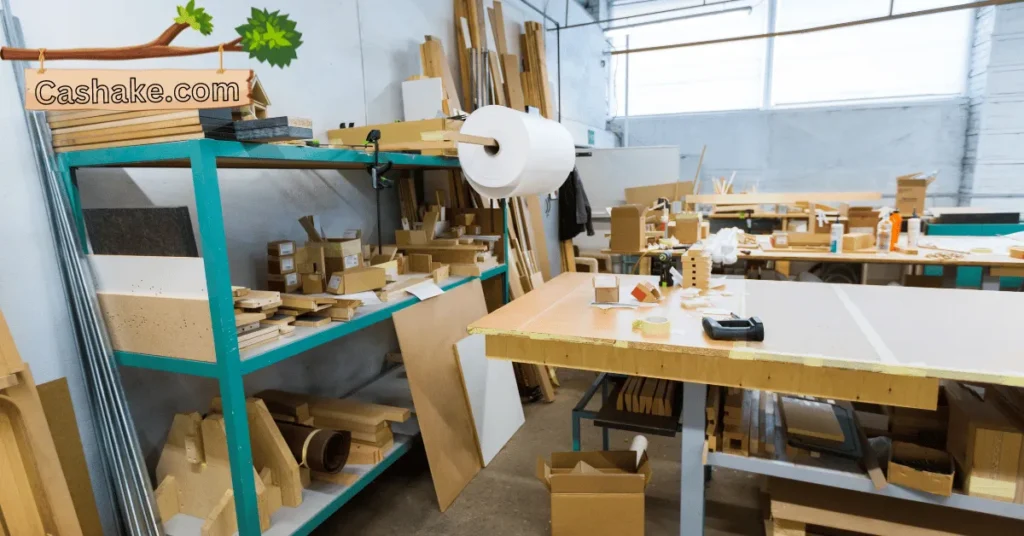
Clamping those big panels can be a bit tricky, but hey, it’s a must-know for any woodworker worth their sawdust.
Whether you’re whipping up a fancy table, knocking together a cabinet, or crafting some awesome furniture, you’ve got to nail down the art of securing those panels like a pro.
Why? So you can whip up a killer glue-up or work on your project without worry.
In this read, I am gonna break it down for you – how to clamp large panels, no sweat. I’ll chat about the types of clamps out there, helping you pick the perfect ones for your gig.
Plus, I’ll spill the beans on how to clamp those oversized panels like a champ without risking a thing. And, of course, I’ll drop some pro tips on the way and steer you clear of those common blunders.
Key Takeaways
- Choose the right clamps for your woodworking project’s size and needs.
- Ensure even pressure when clamping to prevent wood warping.
- Clean and maintain your clamps for longevity and reusability.
- Follow glue drying times to avoid premature clamp removal.
- Apply cauls to distribute pressure evenly during clamping.
- Use scrap wood or cauls to protect wood surfaces.
- Avoid over-tightening clamps to prevent wood or joint damage.
- Check for alignment throughout the clamping process.
- Select specific clamps for various woodworking joint types.
- Share your woodworking knowledge to build a skilled community.
What are clamps?
Clamps are like the unsung heroes of woodworking, quietly doing the heavy lifting when it comes to holding wood pieces together.
They’re your trusty sidekicks, especially when you’re waiting for that glue to dry or need to shape some wood. Clamps come in all shapes and sizes, and they can be made from wood, metal, or plastic.
Now, let’s talk about why clamps are the real MVPs in woodworking:
- Gluing it Together: Imagine trying to glue up multiple wood pieces without clamps. It’d be a sticky mess! Clamps step in and keep everything snug until the glue sets.
- Furniture Magic: When it’s time to assemble that gorgeous piece of furniture you’ve been working on, clamps make sure everything lines up perfectly. No wobbly tables on their watch!
- Steady Work: Working on individual projects? Clamps are your buddies. They firmly attach your wood to a workbench or sawhorse, giving you stability and control.
- Precision Cuts: Clamps help keep your wood pieces in line while you work your magic with cutting or shaping. This means your creations turn out just the way you envisioned.
Now, if you want to be a clamp pro, here’s the lowdown:
- Placement: Slide those clamp jaws around the wood sections you’re joining or securing.
- Tighten Up: Gently crank up the clamp until it holds your wood pieces snugly. Don’t go overboard; just enough pressure to keep things together without squishing your wood.
Oh, and a word of wisdom: when you’re gluing, let it dry before removing the clamps. Patience pays off here; prematurely removing them could mess up your masterpiece!
What are the different types of clamps?
When you dive into woodworking, you’ll quickly discover a whole bunch of clamps, each with its special gig.
These clamps aren’t just tools; they’re like your trusty sidekicks, making woodworking a whole lot easier and more precise.
Let’s take a laid-back look at some of the popular woodworking clamps and what they’re all about:
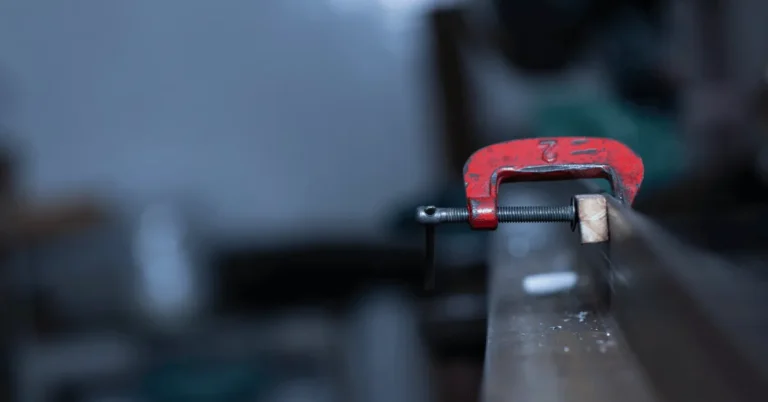
C-clamps: These bad boys are the jack-of-all-trades in the woodworking world. They’re like the Swiss Army knives of clamps, with their C-shaped frame and a single screw.
You can use them for gluing stuff, putting workpieces together, or holding things steady when you’re drilling or routing.
Bar clamps: Picture a long bar with jaws at both ends – that’s the bar clamp for you. One jaw stays put, while the other slides along the bar, thanks to a threaded screw.
They’re great for those big, chunky projects or when your wood isn’t playing nice and staying even.
Spring clamps: These clamps are the easy-going buddies of the woodworking world. They’ve got two jaws held together by a spring.
Just squeeze the handles, and they’ll open up. Let go, and they’ll clamp shut. They might not be the strongest, but they’re quick and easy to use.
Pipe clamps: Imagine a bar clamp, but instead of a solid bar, you’ve got a pipe. That’s the deal with pipe clamps.
They’re flexible, especially when you’re clamping curved stuff or hefty workpieces that don’t want to behave.
Band clamps: These clamps are like the rockstars of clamps. They use a band of material to squeeze your workpiece.
No matter the shape or size, they’ve got it covered. Perfect for those big, tricky projects that other clamps can’t handle.
And there’s more! Check out these clamp MVPs:
- F-clamps: They’re like beefed-up C-clamps with a wider jaw and a longer reach. Perfect for when you’re dealing with larger or hard-to-reach pieces.
- Corner clamps: Made for those perfect 90-degree angles, these clamps are your go-to for assembling things like picture frames and snazzy mitered corners.
- Hand screw clamps: For those delicate jobs or when you need pinpoint accuracy, hand screw clamps with their twisty action have your back.
- Locking clamps: These champs lock in place after you’ve tightened them up. They’re the marathon runners of clamps, perfect for those long-haul gluing projects.
Picking the right clamp is all about what you’re working on – the size and shape of your project, how much squeeze you need, and how easy you want it to be.
So, keep a bunch of these buddies in your workshop, and you’ll be ready for any woodworking adventure.
How to choose the right clamps for your project?
When you’re in the woodworking game, picking the right clamps is like choosing the right tools for the job.
There’s a whole toolbox of woodworking clamps out there, and each has its deal. To make sure you’re on point, here are some things to keep in mind:
1. Type of Project: What you’re building decides the clamps you need. Big projects like a solid tabletop call for heavy-duty clamps.
But if you’re crafting something dainty like a jewelry box, those lighter-duty ones will do the trick.
2. Size Matters: The size of your project tells you how long your clamps should reach. Big tabletop? Go for those long-reach champs. Small stuff like jewelry boxes? A shorter reach is just fine.
3. Squeeze Game: How much pressure you need depends on the wood and joint you’re working on. Hardwood likes it tight, while softwood is more chill during glue-ups.
4. Easy Peasy: Some clamps are a breeze to use, like those spring-loaded ones. But they might not hug as hard as others. Pipe clamps, for example, pack a punch but might need a bit more finesse.
5. Budget Talk: Your wallet’s got a say too. Clamps come in all price ranges, so pick ones that match your budget and your project needs.
Specific clamps
Now, let’s break down some specific clamp heroes and where they shine:
- F-clamps: These versatile buddies won’t break the bank. They’re perfect for gluing up edges, holding your workpieces down, or even getting jiggy with your router.
- Pipe Clamps: Heavy-duty and strong, these are your go-to for big projects like table tops and cabinets. They’re also up for keeping your workpieces in check while you work your magic.
- Parallel Clamps: When you need to spread the love evenly across your workpiece, these are the ones. They handle big projects like a boss and can even deal with the curvy ones.
- Bar Clamps: They’re like pipe clamps but with a solid bar. Reliable for big jobs and tricky shapes.
- Spring Clamps: If you’re working on smaller stuff like jewelry boxes or picture frames, these lightweights are your jam. They’re also handy for holding stuff in place temporarily.
If you’re not sure where to start, grab some F-clamps and pipe clamps. They’re like the Swiss Army knives of clamps, ready for whatever woodworking adventure you’re on.
As you get more skills under your belt, you can expand your clamp crew to handle even more specialized tasks.
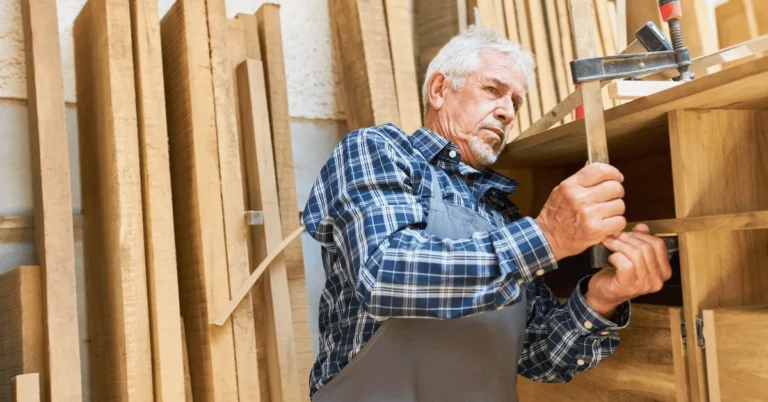
How to clamp large panels together safely?
Alright, let’s talk about wrangling those big woodworking panels together. It’s all about getting things lined up and bonded right. Here’s the laid-back guide to doing it:
What You Need:
- Big woodworking panels ready to join.
- Your choice of clamps – think pipe clamps, bar clamps, or parallel clamps.
- Wood glue that suits your project.
- Optional: Dowels, biscuits, or other alignment helpers.
- Sandpaper or a block plane for smoothing edges.
Step-by-Step:
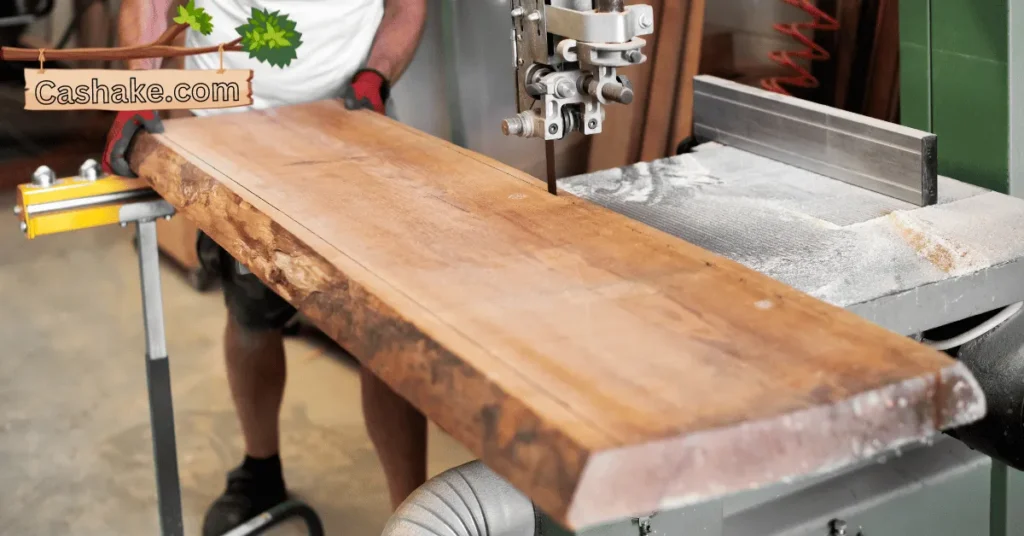
1. Panel Prep:
Make sure those panel edges you’re joining are straight, flat, and silky smooth. A joiner, planer, or just good old sandpaper can help with this. Smooth edges mean a snug fit.
2. Glue It Up:
Get generous with the wood glue on one of those edges. Spread it out nicely even with a brush or a roller.
3. Line ‘Em Up:
Gently put the two panels together, glued edges facing each other. Make sure they cozy up nicely and that any patterns or grains match if that’s your thing.
4. Alignment Helpers (If Needed):
For extra-precise alignment, you can bring in dowels, biscuits, or other helpers. Drill some holes or slots in both edges before applying glue and pop those aids in. They’ll keep things on track during clamping.
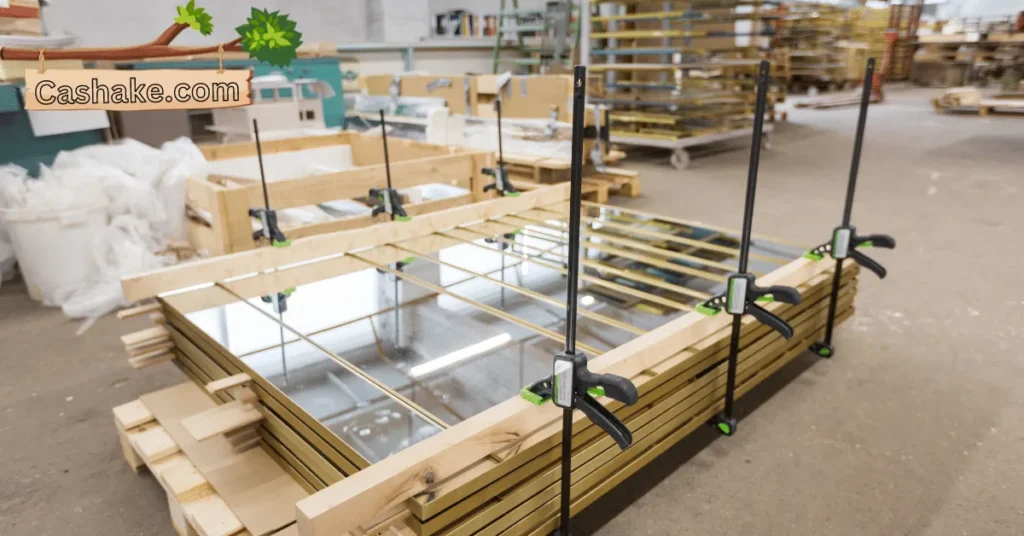
5. Clamp Party:
- Pick your clamps based on the panel size and how much squeeze you need. Pipe clamps, bar clamps, or parallel clamps work great for big panels.
- Lay the clamps across the width, evenly spaced along the seam.
- Start with a gentle squeeze on the clamps to avoid panel shuffling.
- Gradually ramp up the pressure evenly across all clamps until that seam is sealed tight. Keep an eye on alignment as you crank those clamps.
- Toss in some cauls (flat pieces of wood) on top and bottom to spread the pressure and protect your panels from clamp marks.
6. Alignment Check:
Before the glue sets, double-check that your panels are still buddies. Adjust if they’re not.
7. Wipe That Glue:
While the glue is still wet, grab a damp cloth or sponge and wipe away any extra glue that oozed out of the joint.
8. Let It Dry:
Now, it’s waiting time. Follow the glue manufacturer’s drying instructions, which can be anywhere from a few hours to overnight.
9. Clamp Break-Up:
Once that glue’s rock solid, carefully release your clamps.
Tips for clamping large panels together

Alright, let’s chat about making sure those big panels in your woodworking project stick together like best buds. Here’s the lowdown on getting that bond just right:
Get Clamped Up: First things first, don’t skimp on clamps. It’s like the more, the merrier. Rule of thumb: one clamp for every 6 inches of the joint. Better to have too many than too few.
Spread the Love: Space out those clamps along the whole joint. Even pressure all the way across keeps things from going wonky and ensures a solid bond.
Cauls to the Rescue: Grab some cauls, which are long pieces of wood. They’re like the peacekeepers, making sure your panel doesn’t twist or warp under clamp pressure.
Easy on the Squeeze: Don’t go all Hulk on the clamps right away. Start with a gentle squeeze to keep your boards together, then gradually tighten them up. It’s like a slow dance – no slipping or sliding.
Square It Up Before you dive into clamping, use a clamping square to check that your panels are perfectly square to each other. This way, you’re locked in for a spot-on joint.
Bonus Tips for Clamping Coolness:
- Wide Cauls: Go for cauls a tad wider than your panel to avoid any nasty marks on the wood.
- Pipe Clamps in Line: If you’re using pipe clamps, make sure those pipes are buddies and run parallel. It’s all about that even pressure.
- Bridge It: When your panel is wider than your clamps can handle, bring in the “bridging” move. Put a scrap piece of wood across the joint and clamp that scrap to your panel. Boom, extended reach.
- Easy Does It: Watch out for over-tightening. You don’t want to Hulk-smash your wood or mess up that glue joint.
- Wait It Out: Once you’ve got those panels locked in, give the glue time to dry right. It could take a few hours or even an overnight stay, depending on your glue type. Be patient, and you’ll have a rock-solid bond.
With these tips and tricks in your back pocket, you’ll be clamping like a pro in your woodworking adventures.
Common mistakes to avoid when clamping large panels together

Let’s talk about getting those big woodworking panels to buddy up without any drama. Here’s the deal on avoiding the usual hiccups:
Don’t Go Hulk: First off, don’t go all Hulk on the clamps. Too much pressure can mean trouble like panels warping or glue oozing out all over the place. Keep it chill, just enough pressure to get a thin, even line of glue.
Even Steven: Make sure your clamping pressure is playing fair. If it’s uneven, your boards might start playing musical chairs. Use enough clamps to keep things steady, and keep an eye on alignment as you tighten up.
Right Tool for the Job: Not all clamps are cut out for the big panel gig. Pipe clamps and cauls are your go-to for keeping those big panels flat and happy.
Cauls Are Cool: Cauls are like the peacekeepers of your glue-up party. They sit on either side of your panel, making sure pressure is spread out nicely and even. Super crucial with large panels to prevent any weird warping.
Patience, Young Grasshopper: Give that glue a little alone time before you go squeezing things together too tightly. It helps prevent any last-minute shifts.
Pro Tips for Panel Happiness:
- Flat Ground: Always glued up on a flat surface like a workbench or sawhorse. Keeps things nice and flat during the magic bonding moment.
- Spacer Magic: If you’ve got a bunch of clamps in play, toss some spacers between them. They’ll make sure the pressure is spread out evenly.
- Alignment Check: As you crank those clamps, keep checking to make sure your boards are still playing nicely and staying aligned.
- Clean-Up Party: After the glue’s had its beauty sleep, wipe away any extra glue with a damp cloth.
Follow these laid-back tips, and you’ll be a pro at gluing up those big panels without the usual headaches.
How to clamp a tabletop?
Time to get down to business and clamp up that tabletop in woodworking. Here’s the lowdown on what you need and how to make it happen:
The Gear:
- Clamps: Pipe clamps are the stars here, but you can also roll with bar clamps or F-clamps if that’s your jam.
- Cauls: They’re like the secret sauce, highly recommended for even pressure.
- Scrap Wood: Optional but handy for shimmying up clamps, especially with bar clamps or F-clamps.
- Glue: Regular wood glue is the glue of choice for this tabletop union.
The Play-By-Play:
1. Prep the Tabletop: Start by getting your tabletop pieces in shipshape. Joint and plane those board edges until they’re flat and square.
2. Glue It Up: Get friendly with the wood glue. Spread it on one edge of each board that’s about to become best pals.
3. Bring ‘Em Together: Carefully line up those board edges and press them together.
4. Cauls to the Rescue: Pop a caul on top of the tabletop at each joint. These babies make sure the pressure is spread out like butter on toast.
5. Top-Side Clamping: Place clamps on top of the cauls and give them a gentle tightening. You’ll see a bit of glue oozing out – that’s the good stuff.
6. Bottom-Side Cauls: Now, flip the tabletop and add cauls on the underside, lining them up with the joints.
7. Bottom-Side Clamping: Position clamps on the underside, making sure they’re pushing against the cauls. Start tightening those clamps slowly.
8. Patience is a Virtue: Let the glue do its thing and dry up. This could take a while, depending on the glue type.
Pro Tips and Extras:
- If you’re rocking bar clamps or F-clamps, toss in some scrap wood to shim them up for that sweet even pressure.
- Don’t go wild with the clamp-tightening to avoid any tabletop warping.
- For super-sized tabletops, consider working on clamping in sections.
Extras (If You’re Feeling Fancy):
- Use a winding stick to check if your tabletop is staying flat both before and after clamping.
- Give those cauls a friendly tap with a rubber mallet to keep things flat and even.
- After the glue’s all dried up, wipe away any extra glue with a damp cloth.
- Check your tabletop for any gaps or quirks after removing the clamps. Fill ’em up with wood putty. Once that’s dry, you can sand and finish your tabletop to make it look snazzy.
That’s the scoop on clamping up a tabletop – time to get those boards to stick together like glue!
How to clamp a table leg?
Alright, let’s talk table leg clamping in woodworking. We’re keeping it simple. Here’s what you need to know:
Set Up Shop: First things first, get yourself a flat and level work surface. A trusty workbench or some sawhorses can help out here. You’ll need that support for your table leg and the other wooden bits you’re working with.
Glue It Up: Get friendly with the glue. Slather it generously on both sides of the joint, making sure you cover all the wood you can see.
Get Clamping: Now, it’s clamp time. Use those clamps to squeeze that joint together nicely and tight. Make sure they’re evenly spaced and that your joint is looking good.
Let It Dry: Time to play the waiting game. Check the glue’s label for drying time instructions. Once it’s good to go, take off those clamps, and your table leg is ready for action.
Now, Some Tips for Different Joints:
Mortise and Tenon Joint: This is the heavy-duty joint for table legs. You’ll want two clamps for this one, one on each side of the joint. Line them up with the mortise and tenon and twist ’em until that joint feels snug.
Dowel Joint: Dowel joints are another popular choice. How you clamp ’em depends on how many dowels you’ve got and how big the joint is. A band clamp can be your buddy here. Wrap it around the joint and crank it until it’s snug.
Pocket Hole Joint: If you’re going with a pocket hole joint, you’ll need a pocket hole jig to drill those holes just right. Once that’s done, clamp the joint by sliding in those pocket hole screws and tightening them up until it’s snug.
That’s the deal with clamping table legs in woodworking – simple, right? Now go forth and make some sturdy tables!
How to clamp a table apron?
Alright, let’s break down the art of clamping a table apron in woodworking. It’s simpler than you might think. Here’s what you’ll need and what to do:
Tools and Materials:
- Clamps: Grab some bar clamps, pipe clamps, or F-clamps – your apron’s best buddies.
- Cauls (Optional): These are like the secret sauce for even pressure and no bowing.
- Scrap Wood (Optional): Handy for protecting the wood, especially when you’re clamping the apron to a table leg.
Step-by-Step:
1. Glue It Up and Dry Fit: Start by slathering some glue on the mating surfaces of your apron pieces. Then, do a dry fit – make sure those apron pieces are square and playing nice together.
2. Cauls (If You Want ‘Em): If you’re into extra stability, pop a caul on top of those apron pieces. They’re all about even pressure and saying no to bowing.
3. Time to Clamp: Now, it’s clamp party time. Position those clamps on your apron pieces, making sure they’re square to the glue joint. Start tightening them up bit by bit until those apron pieces are one happy family.
4. Clean-Up Time: Got any extra glue trying to sneak out? Wipe it away with a damp cloth for a clean finish.
5. Let It Dry: Give that glue some alone time. It needs to dry completely before you can unleash your masterpiece. This could take a bit, so be patient.
Some Pro Tips:
- Right Number of Clamps: Make sure you’re using enough clamps to get a snug bond between those apron pieces.
- Caul Size and Placement: If you’re using cauls, match them up to the width of your apron pieces, and let them extend a tad beyond the edges for even pressure.
- Don’t Hulk Out: Easy does it with the clamps – too much force can mess up your wood.
- Protect the Table Leg: When you’re clamping the apron to a table leg, slip some scrap wood between the clamp and the apron to avoid any unwanted wood marks.
For Special Scenarios:
- Joining Two Aprons: If you’re connecting two aprons, double-check with a square to make sure they’re aligned, and adjust those clamps as needed.
- Table Leg Action: To keep things square when attaching the apron to a table leg, throw a caul on the inside against the leg – no bowing allowed.
- Dealing with Curves: If you’re wrangling a curved apron, put that caul on the outside along the curve to help shape it just right.
With a little practice, you’ll be a table apron clamping champ, making your woodworking projects sturdy and top-notch.
Important FAQs
A woodworker’s essential clamps include C-clamps, bar clamps, spring clamps, pipe clamps, and F-clamps. These versatile clamps cover a wide range of woodworking tasks and projects.
To prevent wood panels from warping during clamping, ensure that the panels are flat and the clamping pressure is applied evenly across the entire surface. Additionally, use cauls on both sides of the panels to distribute pressure evenly and reduce the risk of warping.
Choosing the right clamps depends on the project’s size, the type of wood, and the required clamping pressure. Consider factors like the type of joint, panel size, and your budget when selecting clamps. F-clamps and pipe clamps are versatile options for many projects.
Yes, clamps can be reused for multiple projects. Ensure that you clean them after each use to remove any glue residue, dirt, or debris. Proper maintenance will extend the lifespan of your clamps.
To secure table legs to a tabletop or apron, apply glue to the joints, use clamps (such as bar clamps or pipe clamps) to hold them together, and allow the glue to dry thoroughly. Adding cauls or scrap wood between the clamps and the wood can help protect the wood surface from marks.
If you over-tighten clamps and risk damaging the wood or joint, release the clamps immediately and reposition them with less pressure. It’s essential to apply gradual and even pressure to avoid damaging your woodworking project.
Final Thoughts
In a nutshell, getting the hang of clamping is a must-know skill for anyone diving into woodworking.
Whether you’re tackling those hefty panels, dealing with table legs, working on aprons, or any other woodworking gig, nailing the right clamping techniques can be a game-changer for achieving a rock-solid and precision-perfect result.
From picking out the perfect clamp for the job to grasping the significance of maintaining consistent pressure and alignment, this article has served as a no-nonsense guide to mastering the art of clamping in woodworking.
It’s not about flexing your muscles; it’s all about finesse and paying attention to the finer points.
Now, it’s your time to roll up your sleeves and put these handy tips and tricks into action. Have you run into any woodworking conundrums or stumbled upon clever solutions during your projects?
Which Edge Banding is Best? (Where and How to Buy it in 2024)
“Having learned the art of clamping, explore ‘Which Edge Banding is Best? (Where and How to Buy it in 2023)’ for your next woodworking adventure. Discover the secrets to perfect edge banding!”