
When you’re deep into crafting or giving your furniture a makeover, there’s this unsung hero that can change the game – it’s called edge banding.
It’s like the secret sauce that can take your project from looking like a pro’s handiwork to something that might’ve been hastily put together. So, what’s the magic ingredient? Well, it’s all about picking the right glue.
In this guide, I am going to dig into the world of edge banding glue, demystify its secrets, and show you what it’s truly capable of.
I’ll give you the lowdown on the different types of edge banding glue out there, explaining what makes each one special and where they shine.
Picking the perfect glue can be the difference between a project that stands the test of time and one that falls apart.
I’ll also share some nifty techniques to apply the glue for that flawless bond and toss in some tips for achieving impeccable results. And hey, I’ll even spill the beans on the pros and cons of various glues, so you can make savvy choices.
So, whether you’re a seasoned wood wizard or just love a good DIY adventure, hop on board, and let’s find what kind of glue to use for edge banding that’ll take your edge banding projects to a whole new level.
Key Takeaways
- Choose edge banding glue based on material and application method.
- Prioritize clean surfaces for a strong bond during glue application.
- Apply glue evenly for a seamless edge banding result.
- Use pressure to ensure a sturdy bond between materials.
- Allow adequate drying time for a reliable glue connection.
- Consider heat and rolling for added bond strength.
- Trim excess edge banding for a professional finish.
- Edge banding glue offers durability and versatility.
- Work in a well-ventilated area and use protective gear.
- Edge banding can be painted or stained for customization.
What kind of glue to use for edge banding?
There are three main types of edge banding glue available:
Hot Melt Glue:
So, you’ve probably heard of hot melt glue, right? It’s like the superstar of edge-banding adhesives. Here’s the deal: it’s a thermoplastic adhesive that goes on all melty and then cools down to create a solid bond.
What’s cool about it is that it’s a breeze to apply, and it doesn’t waste any time drying up. That makes it a top pick whether you’re doing edge banding by hand or using a fancy machine. Plus, it won’t break the bank.
Contact Cement:
Ever heard of contact cement? It’s this adhesive that you slap on both the edge banding and the surface you want to stick it to. Then, you squish ’em together, and boom – they’re best buddies.
Now, this stuff means business. It can handle water and heat like a champ. But here’s the deal: getting it on evenly can be a bit of a challenge, and it’s not the quickest drying glue in town. So, patience might be your new best friend with this one.
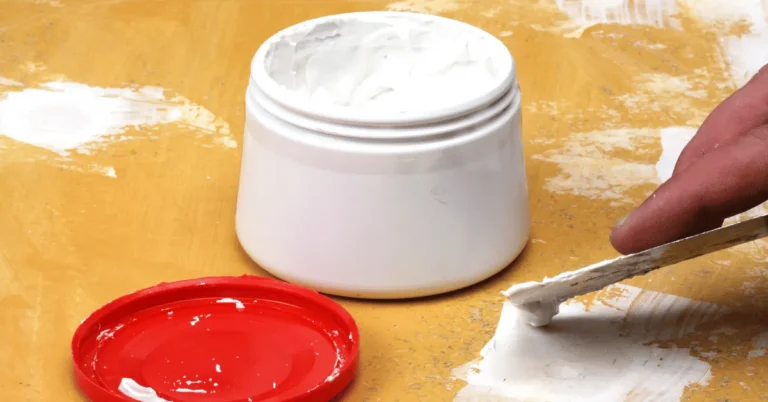
PVA Glue (Polyvinyl Acetate Glue):
Alright, let’s talk about PVA glue. It’s a water-based adhesive that’s a breeze to put on, and the best part? It dries up all clear and neat.
Now, it might not be as tough as hot melt glue or contact cement, but it’s like the reliable buddy you call for light-duty stuff.
The best type of edge banding glue for you will depend on the specific application.
Alright, here’s the lowdown on your glue options for edge banding:
Hot Melt Glue: If you’re all about quick and easy, hot melt glue is your go-to. It’s a breeze to apply, and it dries up in a jiffy.
Contact Cement: Need something tough that can handle water and heat? Contact cement’s got your back, but it might test your patience a bit when it comes to applying and drying.
PVA Glue: Now, if you’re into light-duty stuff and you want that adhesive to disappear into the background, PVA glue is your buddy. Super easy to work with, and it dries all clear and see-through.
What factors to consider when choosing the right glue for your project?

So, you’re on a mission to pick the perfect glue for your edge banding project? Great call! Let’s break it down without all the jargon.
Step 1: Know Your Material: First up, what kind of edge banding material are you using? Different glues suit different stuff. Veneer edgebanding vibes with EVA glue, while ABS edgebanding prefers PUR glue. Easy, right?
Step 2: Size Matters: How thick is your edge banding material? Thicker means you’ll need a stronger glue for a solid bond. So, let thickness guide your glue choice.
Step 3: Application Style: How do you plan to apply the glue? Some are all about the hot melt glue guns, while others like it old-school with manual application. Your call!
Step 4: Weather Report: Keep an eye on your work environment. Some glues are sensitive to things like temperature and humidity. Make sure your glue can handle your workspace.
Step 5: Budget Check: Money talks. Glues come in all price ranges, so see what fits your budget while keeping the other factors in mind.
Now, Meet Your Glue Buddies:
- EVA Glue: Versatile, friendly with many materials, and easy on the wallet.
- PUR Glue: Tougher, great for thick materials, but a bit pricier and needs a steady hand.
- Water-based Glue: Less toxic, quick drying, and a breeze to apply, though not as strong as EVA or PUR.
- Solvent-based Glue: Built tough for outdoor projects, but watch out for those fumes.
Pro Tips:
- Always read the glue label to make sure it’s a match for your material.
- Do a test run on a scrap piece before going all-in.
- Follow the glue’s instructions like a recipe for a strong bond.
With these pointers, you’ll glue your way to a pro-level edge banding project in no time.
How to apply edge banding glue?
To apply edge banding glue, gather the following materials: edge banding, hot melt glue, an iron, a block of wood, a tape measure, a pencil, and a sharp knife.
Follow these steps for a successful application:
- Start by measuring the length of the edge banding required for your project.
- Cut the edge banding to the measured length using a sharp knife.
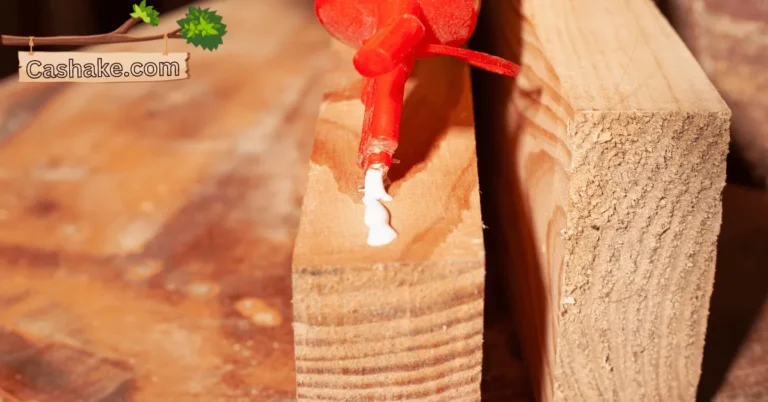
- Apply a thin, even line of hot melt glue along the edge of the workpiece.
- Carefully position the edge banding over the glue, ensuring it is centered and aligned correctly.
- Use the iron to melt the glue and bond the edge banding securely to the workpiece.
- Apply steady pressure to the edge banding using the block of wood to ensure a strong bond.
- Any excess edge banding can be trimmed away with a sharp knife.
Some valuable tips to keep in mind while applying edge banding glue:
- Choose a hot melt glue specifically designed for edge banding to ensure optimal results.
- Ensure that the iron is adequately heated to melt the glue effectively.
- Apply a thin layer of glue to the workpiece; using too much glue can lead to bubbling.
- Prioritize precise alignment of the edge banding before applying heat.
- Maintain pressure on the edge banding with the block of wood for at least 30 seconds.
- Trim off any surplus edge banding using a sharp knife.
Consider these important factors:
- When applying edge banding to curved surfaces, a heat gun may be more suitable than an iron.
- For pieces of furniture exposed to moisture, opt for a water-resistant glue for added durability.
- Remember that edge banding can be painted, stained, or varnished to match the overall appearance of the furniture.
Tips for getting a good bond with the best edge banding glue

Alright, let’s chat about getting that edge banding glue game strong:
Picking the Right Glue: First things first, don’t just grab any glue. The secret sauce is in picking the one that matches your edge banding material and what you’re sticking it to. A good match equals a solid bond.
Prep the Surface: Before you go gluing stuff, make sure your surfaces are spick and span. Clean, dry, and free of any junk. A clean slate sets the stage for a killer bond.
Spread the Love (Evenly): When you’re slapping on the glue, aim for even coverage on both the edge banding and the surface. No need to drown it in glue – a thin, consistent layer does the trick.
Squish It Good: After the glue’s on, use some pressure to press those pieces together. This squishes out extra glue and makes for a clean and sturdy bond.
Time to Chill: Give it some patience. Let that glue dry properly once everything’s clamped together. Rushing this part won’t give you the strong bond you’re after. Only release the clamps when you’re sure it’s cured.
And if you want to go the extra mile:
- Heat Things: Some glues need a little heat to kick into action. If that’s your glue, bring out a heat gun to make it extra strong.
- Roll It Out: After the glue’s activated, roll over the edge banding to press it down. This not only makes it stick better but also gets rid of air bubbles.
- Trim the Edges: Once it’s all dry, use a sharp knife or trimmer to tidy up any extra edge banding. This step is your ticket to a pro finish.
Follow these tips, and you’ll be rocking a solid edge banding project that’s built to last.
What are the advantages and disadvantages of edge banding glue?

Let’s chat about edge banding glue – it’s got some cool perks, but there are a few quirks to watch out for too.
Pro Side:
- Strong & Steady: This glue’s all about building a tough, long-lasting bond between your edge banding and the surface. It’s like the glue version of a superhero cape, holding things together even with heavy use.
- User-Friendly: It’s beginner-friendly. You can slap it on with a glue gun, a roller, or a brush – pick your weapon!
- Mr. Versatile: Works like a charm with different edge banding materials, whether it’s PVC, ABS, or veneer. No material bias here.
- Budget-Friendly: It’s kind to your wallet. You won’t break the bank using this stuff.
Flip Side:
- Messy Business: Watch out for messiness during application. If you’re not careful, it can get a bit chaotic. Keep those paper towels handy!
- Removal Hassles: Mess up the application, and you’re in for some elbow grease. Taking it off is no walk in the park.
- No Hot Baths: Don’t expose it to high temps or lots of moisture – it’s not its jam.
- Fumes Alert: Some types can give off fumes, so if you’re sensitive to that, make sure you’ve got a breeze going.
So there you have it – edge banding glue, the friendly but occasionally messy sidekick for your projects. It’s got strengths, but just be mindful of its quirks, and you’ll be bonding like a pro.
Important FAQs

Edge banding serves to conceal and protect the exposed edges of wood or particleboard, providing a finished look and enhancing the durability of furniture and other woodworking projects.
While regular glue may work for edge banding in some cases, it’s recommended to use specialized edge banding glue for optimal results. Edge banding glue is designed to create a strong and long-lasting bond specifically for this application.
To select the ideal edge banding glue, consider factors such as the type of material you’re working with, your preferred application method, and your budget. Different glues offer varying levels of durability, ease of use, and price points.
Yes, it’s essential to work in a well-ventilated area when using edge banding glue, as some types can emit fumes. Additionally, wear appropriate protective gear, such as gloves and safety glasses, to prevent contact with the glue.
Yes, edge banding can be painted, stained, or varnished to match the overall appearance of your woodworking project. Ensure that the glue has fully cured and the surface is clean before applying finishes.
Final Thoughts

In the realm of woodworking and crafting furniture, the choice of glue can be a game-changer. Edge banding, often an unsung hero in the world of creating professional-looking projects, hinges on using the right adhesive.
Let’s dive into the top three contenders: Hot Melt Glue for those looking for speed and ease, Contact Cement for durability, and PVA Glue for that clean and polished finish.
When you’re on the hunt for the ideal glue, think about what materials you’re working with, your preferred application method, and, of course, your budget.
Each type of glue has its unique strengths and quirks, so making the right choice is key to ensuring your project stands the test of time.
The process of applying edge banding glue demands precision and a healthy dose of patience. Whether you’re a fan of cutting-edge tools or prefer tried-and-true techniques, our tips will help you achieve a seamless bond.
Remember, a solid connection starts with selecting the right glue and ends with meticulous attention to detail.
As you embark on your journey into edge banding, we invite you to share your own experiences, tips, and questions in the comments section below.
Do I Need to Sand Before Edge Banding? (A Comprehensive Guide 2023)
“After delving into the basics of edge banding, your next must-read is ‘Do I Need to Sand Before Edge Banding? (A Comprehensive Guide 2023).’ Let’s dive deeper into honing your woodworking projects!”