Do I Need to Sand Before Edge Banding? (A Comprehensive Guide 2023)
In the world of woodworking and carpentry, edge banding is like the secret sauce for achieving a pro-level finish. Ever found yourself pondering, “Should I bother with sanding before edge banding?” Well, you’re not the only one.
Let’s chat about it in this article, which is your friendly guide to all things edge banding.
“Do I need to sand before edge banding?”
Sounds like a straightforward question, right? But there’s a whole universe of knowledge behind it that any DIY enthusiast should explore.
We’ll cover everything from the basics of edge banding to the nitty-gritty of when and how to get that sandpaper involved.
Now, why bother with edge banding at all? What’s the deal with sanding, and are there any sneaky drawbacks? And, of course, we’ll chat about when it’s smart to sand before edge banding and when you can skip that step.
So, grab your toolkit, and let’s embark on this woodworking journey together! Whether you’re a newbie or a woodworking wizard, this article is your trusty sidekick for mastering the art of edge banding. Let’s dive into this woodworking adventure!
Key Takeaways
- Sand plywood edges if rough for better edge banding adhesion.
- Smooth edges enhance safety, aesthetics, and adhesive efficiency.
- Pre-sanded plywood or delicate edge banding may skip sanding.
- Select appropriate grit sandpaper for plywood condition.
- Clean off sanding dust before applying edge banding.
- Use a sanding block for precise and controlled sanding.
- Follow wood grain to avoid rough spots while sanding.
- Trim edge banding neatly after applying for a polished finish.
- Read the edge banding kit manual for tips and quirks.
- Apply even pressure and heat adhesive for a solid bond.
What is edge banding?
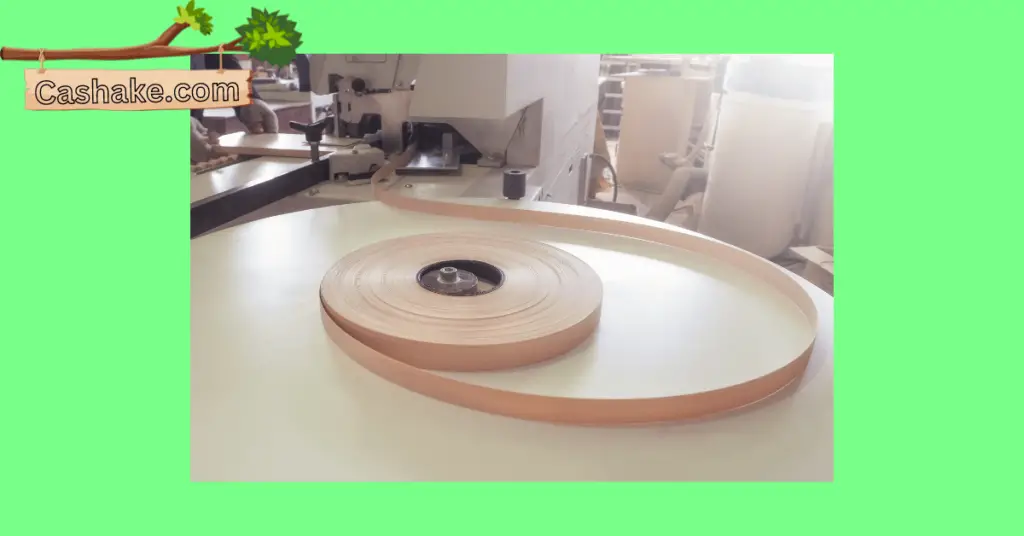
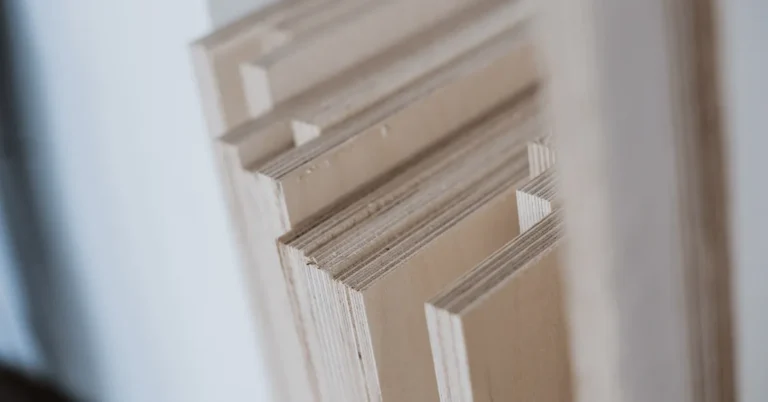
Do you know that little strip called edge banding? Well, it’s like the unsung hero of woodworking. It’s super thin but does a big job in making sure your wood products, like plywood, MDF, and particleboard, stay tough and look good.
So, what’s its secret power? Edge banding wraps around the edges of these materials, protecting them from all sorts of harm while making them look sleek and polished. And guess what? It’s a total-style chameleon.
You can get it in wood veneer, plastic laminate, or PVC, in all sorts of colors and finishes to match your project’s vibe.
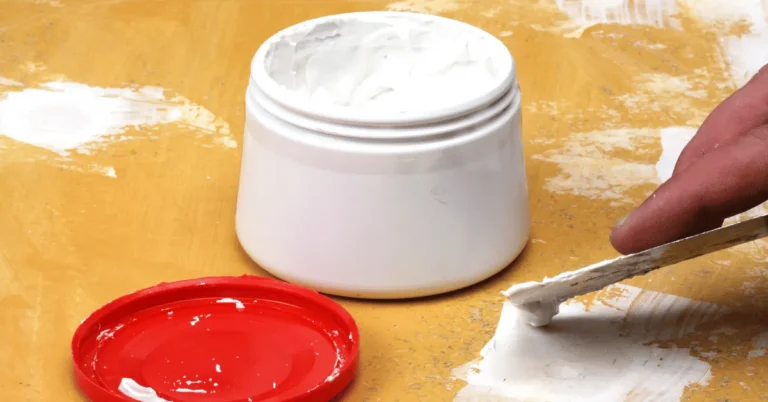
Applying edge banding is like an art. There are different ways to do it, like using hot melt adhesive, pressure-sensitive adhesive, or mechanical fasteners.
The hot melt method is pretty popular – you slap some adhesive on the edge of your wood piece and stick the edge banding on like a pro.
In the world of making wood stuff, edge banding is the real MVP. It’s not just about protection; it’s about making things look amazing and last longer.
Why is edge banding used?

Let’s talk about edge banding – it’s like the unsung hero of furniture. Why? Because it’s got two superpowers: toughness and good looks.
First up, toughness. Edge banding’s job is to protect the edges of stuff like plywood, particle board, and MDF. It’s like an invisible shield against scratches, dents, moisture, and warping. So, your furniture stays strong and lasts way longer.
Now, the cool part – the looks. Edge banding makes your furniture look pro-level sleek. It’s all about that seamless finish. Think cabinets, desks, and tables – they all get the edge banding treatment to look polished and professional from every angle.
You’ve got options for the edge banding material, like wood veneer, PVC, ABS plastic, or melamine, depending on the style you’re going for.
Practical examples? Sure! Cabinets get edge banding to stay tough and look seamless. Desks use it for protection and that pro vibe. Tables? The same story, plus it keeps them lasting. Even shelves get in on the action for added durability and style.
So, whether you’re a furniture pro or a DIY enthusiast, edge banding is your secret weapon for making stuff that’s tough and totally on point.
Do I need to sand before edge banding?

The decision of whether or not to sand before applying edge banding to plywood hinges primarily on the current condition of the plywood edge.
Plywood edges can vary greatly in terms of smoothness and quality, so it’s essential to assess their state before proceeding with the edge banding process.
If your plywood edge feels like it’s been through a rough day (rough or uneven), you’re in for some sanding action.
Sanding is like the prep work here. It takes that unruly edge and turns it into a smooth operator. Not only does it look good, but it also makes sure your edge banding sticks like glue, creating a solid bond.
Sanding is like the superhero for rough plywood edges. It gets rid of any funky bumps that could mess with the edge banding. Plus, it makes everything look seamless like they were meant to be together.
Now, here’s the plot twist: If your plywood edge is already smooth and looking dapper with no roughness or weird stuff going on, you can skip the sanding part.
Sanding a smooth surface when it’s already okay might do more harm than good. So, save your sandpaper for another day, and let that smooth edge shine!
What are the advantages of sanding before edge banding?

Why bother with sanding before diving into edge banding? Well, it’s like giving your project a VIP treatment! Here’s why:
1. Super Stickiness: Sanding those plywood edges gets rid of any nasty saw marks, splinters, or imperfections that could mess up your edge banding’s adhesion. The result? A rock-solid bond that’s tough as nails.
2. Smooth Operator: Sanding makes those plywood edges silky smooth. Your edge banding loves that, and it shows – your project looks way more refined and polished.
3. Chip-Free Zone: Nobody wants chipping or peeling down the line. Sanding takes care of sharp edges that could cause trouble later, keeping your project looking great for longer.
4. Trim with Ease: Sanded edges make trimming edge banding a piece of cake. No more worrying about splinters or tears during the trimming dance.
And there’s more:
5. Adhesive Saver: When your surface is well-sanded, adhesives bond like besties. You use less glue, saving both time and money.
6. Sneaky Edge Banding: Sanding ensures your edge banding blends so smoothly with the plywood that it practically disappears. Say hello to a sleek, undercover look.
So, remember, it might seem like a small step, but sanding before edge banding can seriously level up your project’s quality and style. It’s like the secret sauce for woodworking success!
What are the disadvantages of sanding before edge banding?

Now, let’s chat about the flip side of the coin: sanding before edge banding. It does have a few cons to consider.
1. Edge Banding Trouble: First off, you might end up giving your edge banding a hard time. This stuff is thin and delicate, and sanding can make it go wonky. Imagine it not sticking right or even deciding to peel off mid-project – not fun.
2. Dust Drama: Sanding means dust, and dust is not your edge banding’s BFF. Those tiny particles can sneak into the adhesive and mess up its bonding powers. Result? You might end up with edge banding that’s not quite as snug as you’d like.
3. Trim Trouble: Achieving that perfect flush trim can be a real challenge after pre-sanding. Trying to sand edge banding after it’s on can lead to a not-so-pretty finish and a not-so-great fit with the wood.
4. Messy Mayhem: Lastly, the dust party created during sanding can turn your workspace into a dusty disaster zone. More cleaning, less woodworking fun.
If you do decide to take the pre-sanding route, be extra careful not to harm your edge banding. And don’t forget to gear up with a dust mask – safety first!
In most cases, the smoother path is to sand after you’ve already applied the edge banding. It keeps your edge banding happy, gives you that sleek finish, and avoids the downsides of sanding before the banding fun begins.
When to sand before edge banding?

Sanding before edge banding in woodworking? It’s kind of like a “choose your adventure” situation. Here’s the lowdown on when to give it a go:
When the Plywood’s Acting Rough:
So, picture this: your plywood edge feels a bit like it’s had a wild day in the workshop – rough, uneven, with saw marks and splinters saying hello.
In this scenario, it’s a good call to whip out the sandpaper before you start the edge banding party.
Sanding will work its magic, smoothing out those quirks and setting the stage for a strong bond with the edge banding.
Solid Bond Goals:
You want that edge banding to stick like a pro, right? Sanding is your trusty sidekick in achieving this. It creates a clean and smooth canvas for the edge banding adhesive to cling to, resulting in a bond that’s as solid as a rock.
Polished Perfection:
Let’s not forget the aesthetics – sanding doesn’t just make the bond better; it makes your project look top-notch.
It’s like giving your plywood edge a makeover, making it look refined and polished, and ultimately, elevating the whole project’s pro game.
Safety First:
No one wants to deal with sharp edges, especially when it involves woodworking. Sanding before edge banding ensures that you’re in the clear, reducing the risk of chipping or peeling during and after the edge banding process. Safety always comes first!
Trimming Made Easy:
Sanded edges are like a dream come true when it’s time for trimming. No more worrying about splinters or tears messing up your finish. It’s a breeze to achieve that flush and seamless look.
Less Glue, More Efficiency:
Here’s a pro tip – when your surface is all sanded up, adhesives stick like glue besties, and you end up using less of it. This not only saves you money but also speeds up the drying time.
Seamless Style:
If you’re all about that sleek and seamless look, sanding is your secret weapon. It ensures that the edge banding blends so smoothly with the plywood that it practically disappears into the project. Stealth mode engaged!
In a nutshell, sanding before edge banding is your go-to move when the plywood edge is feeling a bit rough around the edges. It amps up the bond, boosts the appearance, and ensures your project is a cut above.
But, if your plywood edge is already smooth and dapper, you can skip the sanding and save yourself some time and hassle. Happy woodworking!
When not to sand before edge banding?

When it comes to the process of edge banding, there are certain scenarios where sanding beforehand may not be necessary. These situations include:
- Smooth and Defect-Free Edges: If the edge of your plywood is already smooth and free of defects, there may be no need for sanding before edge banding.
- Pre-Sanded Edge Banding: When you are using pre-sanded edge banding, which typically comes with a smooth surface, additional sanding may be redundant.
- Concerns About Edge Banding Damage: If you are worried about potentially damaging the delicate edge banding material with sandpaper, it’s best to avoid sanding before edge banding.
However, when you find yourself uncertain about whether to sand before edge banding, it’s generally advisable to err on the side of caution and proceed with sanding.
This precautionary step ensures that the edge banding adheres securely and results in a smooth and even finish.
Some specific instances where you should avoid sanding before edge banding:
- Pre-Finished Plywood: If you are working with pre-finished plywood, such as veneered or stained plywood, sanding the edge before edge banding could potentially damage the existing finish.
- Routed or Shaped Plywood: When dealing with plywood that has been routed or shaped, abstaining from sanding before edge banding is advisable. Sanding could remove the distinctive router or shaper marks, altering the overall appearance of the final product.
- Very Thin Plywood: For extremely thin plywood, sanding before edge banding might weaken the material and increase the likelihood of cracking or splitting.
When you find yourself in doubt regarding whether to sand before edge banding a specific piece of plywood, it is recommended to seek advice from a professional woodworker with expertise in the field.
Remember that even if you choose not to sand before edge banding, there’s still a need to sand the edge banding after application.
This post-application sanding is essential for removing excess glue and smoothing out any imperfections in the banding.
To achieve this, you can use fine-grit sandpaper (typically in the range of 120-220 grit) along with a sanding block. Take care not to over-sand, as excessive sanding can potentially damage the edge banding.
Following the sanding of the edge banding, you can proceed to apply a finish to the entire piece of plywood to achieve the desired final appearance.
How to sand before edge banding?

Getting that plywood ready for edge banding? No sweat, just follow these steps in a chill, step-by-step fashion.
Sanding Before Edge Banding:
Let’s talk sanding for edge banding prep – it’s a piece of cake, promise!
- Grab a Sanding Block: Get yourself a sanding block – it’s like your trusty sidekick for this job. It gives you awesome control, so you won’t accidentally round those plywood edges.
- Start Rough and Tough: Kick things off with some rough lovin’ – go for a coarse grit sandpaper, like 80 grit. This gritty stuff is your go-to for getting rid of those pesky saw marks and splinters.
- Follow the Wood Grain: Here’s a pro tip – always move that sandpaper in the same direction as the wood grain. It’s like giving your plywood a spa day, and it minimizes the risk of rough spots.
- Finer is Better: Once you’ve tackled the big stuff, switch to a finer grit paper, like a 120 grit. This is where the magic happens – it makes your plywood surface all smooth and ready for some edge banding action.
- Smooth Operator: Keep on sanding until that plywood feels silky smooth to the touch. That’s your cue that it’s ready to rock and roll!
So there you have it, easy peasy sanding for the perfect edge banding setup.
Sanding Tips Before Edge Banding:
Hey, let’s keep things in check:
- Don’t Go Overboard with Sanding: It’s like Goldilocks – not too much, not too little. Over-sanding can make your plywood a bit fragile and prone to cracks, so take it easy.
- For Those Curvy Edges: When you’re dealing with curvy edges, reach for a sanding block that’s like a curve-loving pro. It’ll give you precision and those perfect results.
- Ditch the Dust: Before you dive into edge banding, make sure you’ve given that plywood a dust-off. No sanding dust allowed here! It’s a must for a proper bond.
Now that your plywood’s looking slick and dust-free, you’re all set to get your edge banding game on!
Tips for Applying Edge Banding:
Time to get hands-on with that edge banding – but keep it breezy:
- Read the Kit Manual: First things first, check out the manual that comes with your edge banding kit. They all have their little quirks and tips, so don’t skip this step.
- Heat It: When you’re laying down the edge banding, grab a sharp iron. Heat that adhesive for a solid bond – it’s like the secret sauce for making it stick.
- Spread the Love Evenly: Apply that edge banding evenly along the plywood edge, and don’t be shy with the pressure. You want it to stick like glue (well, it is glue, but you get the idea).
- Trim the Fat: After the magic happens, trim off any extra edge banding with a sharp knife or scissors. Keep it neat for that pro finish.
- Smooth Operator: For that extra touch of finesse, give the edge banding a light sanding. It’s like the finishing touch that makes everything look sleek.
Once you’ve mastered these steps, your project is well on its way to the finish line. Easy, right?
Important FAQs

Yes, if your plywood edge is already smooth and free of defects, you can skip sanding before edge banding. Sanding is primarily necessary to prepare rough or uneven edges for a solid bond with the edge banding.
Start with coarse-grit sandpaper, such as 80 grit, to remove saw marks and splinters. Then, switch to a finer grit, like 120 grit, to achieve a smooth finish. Avoid over-sanding, as it can weaken the plywood.
Before edge banding, thoroughly clean the plywood to remove any sanding dust. This ensures a clean surface for adhesion and prevents dust from interfering with the bond.
For sanding before edge banding, use a sanding block to maintain control. When dealing with curvy edges, select a sanding block designed for curves. Always follow the wood grain while sanding for the best results.
Final Thoughts

In the world of woodworking and carpentry, the choice of whether to sand before edge banding is pretty important stuff. It comes down to what your plywood looks like and what your project is all about.
Now, sanding before edge banding has some sweet perks. It makes sure your edge banding sticks like a champ, gives your project that sleek and polished vibe, and keeps things safe and sound during your woodworking adventure.
It’s like that secret ingredient that takes your project to the next level.
But, hey, no need to go overboard. Sanding too much or sanding when it isn’t needed can cause some hiccups – like potentially messing up delicate edge banding and turning your workspace into a dust cloud.
So, here’s the deal: sanding before edge banding is a bit like choosing your woodworking adventure. Take a good look at your plywood edge, think about the type of edge banding you’re using, and follow the advice in this article to make the right call.
We hope this guide has been your trusty woodworking buddy, helping you master the art of edge banding. But now, it’s your turn to chime in. Have you run into any edge banding conundrums in your woodworking journey? Do you have some wisdom or cool stories to share? We’re all ears!
What Setting for Iron on Edge Banding? (7 Steps Process)(A Comprehensive Guide)
“Having explored the art of sanding before edge banding, it’s time for the next step. Dive into ‘What Setting for Iron on Edge Banding?’ – your comprehensive guide to perfecting the process in 7 easy steps.”