
Looking to step up your woodworking game? Iron-on-edge banding is the way to go! It’s like a secret weapon for giving your projects that sleek, pro finish.
Whether you’re jazzing up plywood, laminate, or melamine, nailing the art of iron-on edge banding can take your DIY game to a whole new level.
In this easy-to-follow guide, I am taking a deep dive into the world of iron-on edge banding. I’ll break down the different types, tell you where it works best, and spill the beans on how to get that flawless finish every time.
Ever wondered why your edge banding doesn’t quite stick or peels off prematurely? I’ve got your back with troubleshooting tips from the pros. And I am going to solve you this question: Why is my iron on edge banding not sticking?
Whether you’re a seasoned DIY expert or just starting, understanding the ins and outs of iron-on edge banding is a game-changer.
By the time you finish reading this article, you’ll be armed with the knowledge and confidence to tackle your projects like a pro. Let’s jump in and uncover the secrets to nailing those edge-banding projects with style and ease!
Key Takeaways
- Choose the right edge banding material for your project’s needs.
- Ensure the surface is clean and dry before applying edge banding.
- Use the correct heat setting on your iron for bonding.
- Apply even pressure during the iron-on process for a strong bond.
- Trim excess banding carefully for a polished finish.
- Consider using contact adhesive for tricky situations.
- Soften edge banding with a heat gun for curved edges.
- Maintain a dust-free environment during application.
- Opt for fresh, undamaged edge banding for a solid bond.
- Seek professional advice when in doubt about your project.
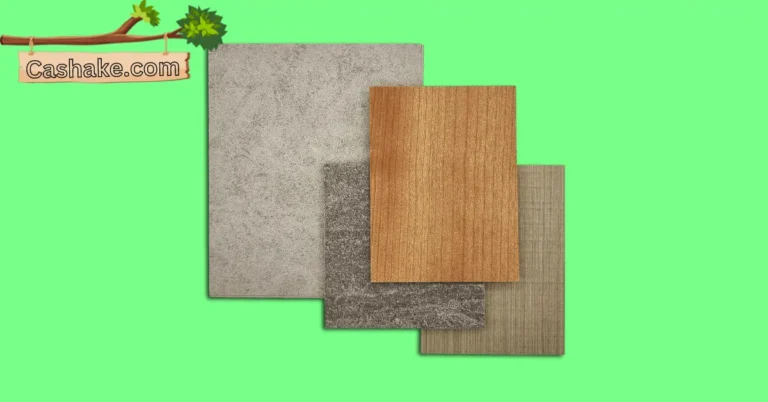
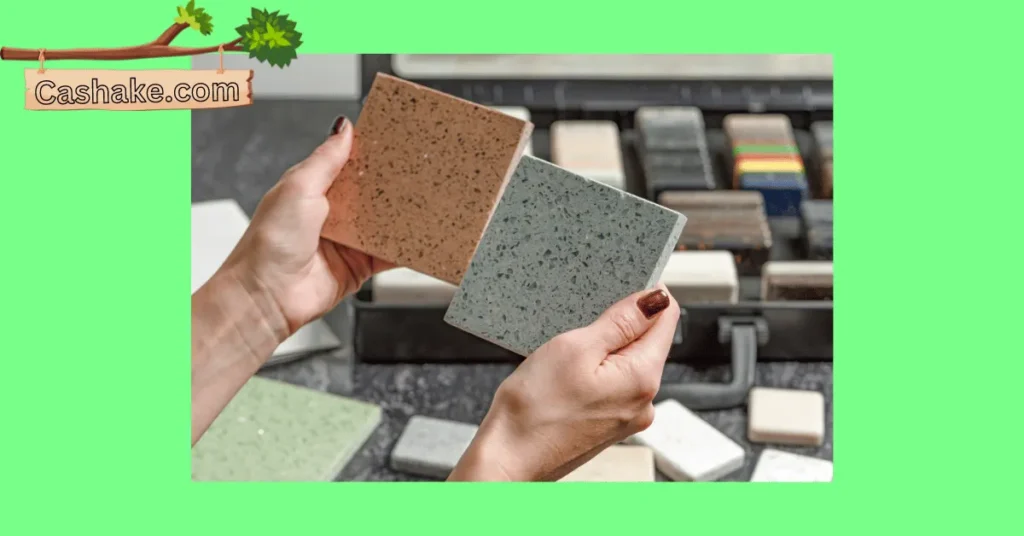
What are the different types of iron-on-edge banding?
Iron-on-edge banding is like the finishing touch your woodworking projects have been waiting for. It’s that thin strip of magic that not only makes your plywood or wood panels look sleek but also shields them from moisture and everyday wear and tear.
Now, let’s talk about the cool options you have:
Wood Veneer: If you’re aiming for a top-notch, seamless look, wood veneer edge banding is your go-to. It’s like a slice of real wood heaven, offering a wide range of wood species and finishes to match your style.
PVC (Polyvinyl Chloride): Looking for something tough and low-maintenance? PVC edge banding has got your back.
It comes in a rainbow of colors and finishes, including wood-like patterns, solid colors, and even metallics. Perfect for kitchens and bathrooms that see a lot of action.
PP (Polypropylene): PP edge banding is the budget-friendly sibling of PVC. It’s just as sturdy and versatile, making it great for high-traffic areas. Plus, it comes in all sorts of colors and finishes, so you won’t run out of choices.
ABS (Acrylonitrile Butadiene Styrene): ABS edge banding is like the superhero of the bunch. It’s tough as nails, resistant to impacts and heat, and perfect for commercial spots like restaurants and hotels. You guessed it – it comes in various colors and finishes too.
But wait, there’s more! It’s not just about the material; it’s also about getting the right thickness and width. Match the thickness of your wood panel and the width to the size of the edge you want to cover.
So, when you’re picking out your iron-on edge banding, think about your project vibe and what you want it to look like. Want that high-end, fancy finish? Go for wood veneer. Need something rugged and easy to clean? PVC or PP is your buddy.
And if your project is a heavy-duty beast, ABS edge banding is the way to go. Your wood panels will thank you!
What are the different surfaces that iron on iron-on-edge banding can be applied?
Now, let’s talk about the fantastic world of iron-on edge banding! It’s like a magic makeover for different surfaces, including:
- Wood
- MDF
- Plywood
- Particleboard
- Melamine
- Laminate
- Acrylic
- ABS
- PVC
- Glass
- Metal
But hold on, before you get all adhesive, here are some pro tips for prepping those surfaces:
Wood: If it’s raw wood, a quick sanding session is your friend. It not only makes things smoother but also helps the banding stick better.
MDF, Plywood, and Particleboard: These can have rough edges, so a good sanding-down is a must. You can even use wood filler to patch up any holes.
Melamine and Laminate: Usually, these are smooth sailing, but give them a wipe-down for extra grip.
Acrylic, ABS, PVC: These might need a special primer first to ensure that the banding holds tight.
Glass and Metal: Yep, they need that special primer too.
Once your surface is prepped and raring to go, it’s time for the magic. Follow the instructions that come with your iron-on edge banding carefully. Keep your iron on medium heat, and press down evenly for the best results.
Oh, and if you’re ever in doubt about whether this banding is the right match for your surface, don’t hesitate to reach out to a pro. They’ll make sure your project shines while keeping your surface intact.
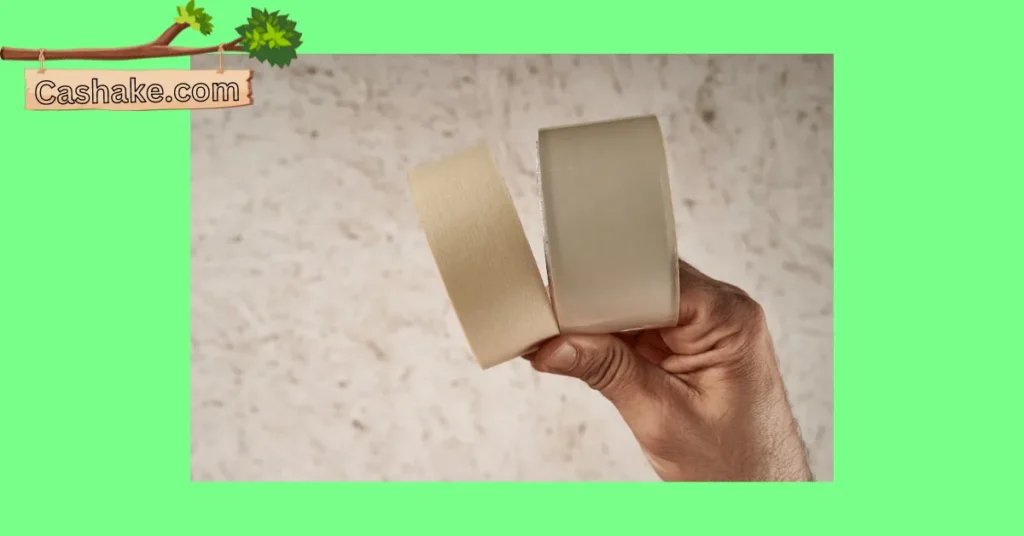
What is the best way to apply iron on edge banding?

To rock the iron-on-edge banding game, you’ll need a few key players:
- Iron-on edge banding
- Your trusty household iron
- An edge trimmer or a sharp utility knife
- Scissors
- Sandpaper (if you’re feeling fancy)
Now, let’s break it down into easy-peasy steps:
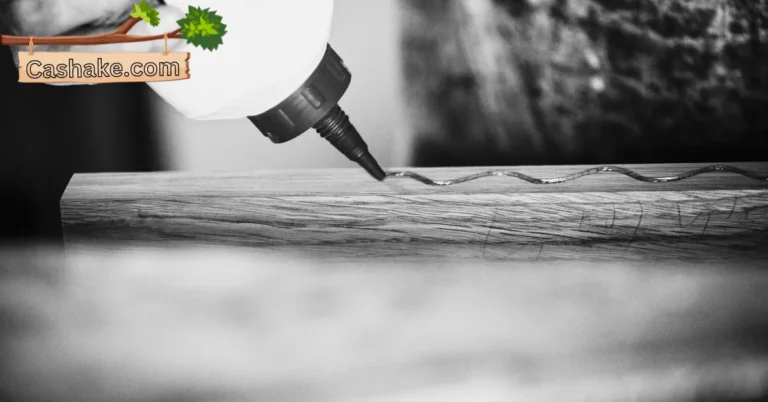
Begin by cutting a length of edge banding that exceeds the target edge by approximately an inch.
Place the edge banding onto the wood, ensuring that the adhesive side is facing towards the surface.
Set your household iron to the highest heat setting, ensuring it’s free from steam – we wouldn’t want any uninvited guests at our bonding session.
Delicately place the iron atop the edge banding and smoothly glide it along the entire edge for an even application.
After ironing, allow it to cool completely. This cooldown time is like a spa day for your bond.
Now, for that polished look, grab your edge trimmer or utility knife and trim off any extra edge banding.
(Optional): If you’re all about that smooth life, grab some sandpaper and give those edges a little love.
Some pro tips to level up your iron-on edge banding game:
Tip 1: Clean that wood edge like you’re prepping for a gourmet meal – no dust or debris allowed. It’s all about that perfect bond.
Tip 2: Once you’ve cut that edge banding, slap it on there pronto to keep the adhesive from throwing a fit.
Tip 3: Don’t go too wild with the iron; we’re bonding, not melting. Overheating can lead to a hot mess.
Tip 4: For those tricky curved edges, consider bringing in the heat gun to soften the adhesive for a more flexible fit.
Tip 5: Mistakes happen – we get it. If you goof up, just heat that edge banding and peel it off for a redo.
With a bit of practice, you’ll be an iron-on edge banding expert, making your projects look pro without breaking a sweat.
Why is my iron on edge banding not sticking? (Reasons)

There are a few usual suspects when it comes to iron-on edge banding not playing nice:
Wrong Heat Setting: Let’s talk about the hot stuff first. Your iron needs to be set at just the right temperature for the glue to do its thing properly.
Too cool, and the glue won’t melt enough, leading to a weak bond. Too hot, and you might end up with a sticky situation, and not in a good way!
Surface Shenanigans: Before slapping on that edge banding, give your wood’s surface a good dusting-off. Dust and grime are the villains here, preventing the glue from doing its job.
Not-So-Flat Surface: Picture this: You’ve got a bumpy, uneven wood surface. Guess what? That’s a recipe for disaster when it comes to adhesion. Smooth it out before you start, or you might end up with some areas that just won’t stick.
Bad Banding Vibes: Edge banding, like milk, has a shelf life. If it’s old or damaged, it’s not going to stick around for long. Fresh, undamaged banding is your ticket to a solid bond.
DIY Drama: How you apply that banding is key. Trim it right and apply it with a steady hand and even pressure. These tricks of the trade are your secret weapons for a bond that can take a beating.
How to troubleshoot iron on edge banding that is not sticking?

Having trouble getting that iron-on edge banding to stick? No worries, here are some quick fixes:
- Clean and Dry It: First things first, make sure your surface is squeaky clean and dry. Dust, dirt, or moisture can mess with that adhesive goodness.
- Heat Right: Check your iron’s temperature. Too hot, and you risk a gooey mess; too cool, and it won’t stick. Find that sweet spot recommended for your banding.
- Press It Down: When you’re ironing on the edge banding, put some muscle into it. Firm, even pressure helps melt that adhesive and make it stick like glue (literally).
- Time it Right: Don’t rush it. Follow the manufacturer’s time guidelines. Too short, and it won’t stick; too long, and you’ll have a meltdown (of the bad kind).
Still no luck? Try these:
- Size Matters: Double-check if your banding fits just right. Too big or too small won’t give you the bond you’re looking for.
- Curvy Edges: Got a curve to deal with? Use a heat gun to soften the banding before sticking it on; it’ll play nice with those curves.
- Cool It: Once it’s on, let it chill and cure completely before trimming the excess. This step is your secret sauce for a super-strong bond.
And if you’re at your wit’s end, consider reaching out to a woodworking pro for some extra wisdom.
Why is my iron-on-edge banding peeling?

Wondering why your iron-on edge banding just won’t stick? Well, here’s the lowdown on why it might be giving you some trouble.
First off, let’s talk about the most common culprit: sloppy application. If you don’t put that edge banding on just right, it’s like asking it to peel off.
Quality matters too. If you’re using some cheap adhesive, it’s not gonna have the muscle to hold things in place.
Then there are those sneaky environmental factors. Heat, humidity, and moisture can gang up on your adhesive, slowly chipping away at its grip.
And if your edge banding is in a rough neighborhood where it gets bumped, scraped, and generally mistreated, it’s more likely to throw in the towel.
So, how do you keep your edge banding in check?
- Make sure your surface is squeaky clean and bone-dry before you slap that banding on.
- Pick up a top-notch adhesive that’s made for this job.
- Apply the edge banding evenly, give it some good pressure, and use a burnishing tool to smooth things out.
- Keep your banding away from extreme heat, humidity, and moisture – they’re like its kryptonite.
- If your edge banding lives in a rough neighborhood, consider going with something tougher, like PVC edge banding. It can take a beating and keep on sticking.
And if you’re already dealing with some peeling drama, try reapplying some adhesive and give it a good burnish. But if it’s a lost cause, don’t hesitate to swap out the whole shebang for a secure and long-lasting fix.
Why is my iron-on-edge banding not sticking to plywood?

Have trouble getting that iron-on edge banding to stick to your plywood as it should? No worries! Let’s break it down for you:
Heat Things First things first, check if your iron is hot enough. Your edge banding relies on a bit of heat to work its magic. For the perfect bond, take a peek at the manufacturer’s instructions and make sure you’ve got the right temperature dialed in.
Get Handsy with Pressure: When you’re ironing things out, remember to apply some good ol’ pressure. Push down firmly and evenly with the iron to help that adhesive stick to the plywood like glue.
Clean Freak: Make sure your plywood’s surface is squeaky clean. Dust and dirt can be total deal-breakers when it comes to adhesion. So, give it a good scrub before you start.
Say No to Moisture: Don’t even think about slapping that edge banding on super moist plywood. Too much moisture can mess with the adhesive’s mojo. Stick to dry plywood to get the best grip.
Width Matters: The width of your edge banding matters. It should be a smidge wider than the plywood’s edge. That little extra width makes sure everything sticks together like best buds.
For surefire iron-on-edge banding success, keep these simple tips in mind:
- Heat Check: Double-check that your iron is set to the right temperature, as the manufacturer suggests.
- Press On: Apply steady and firm pressure when you’re ironing to make that bond super strong.
- Prep the Surface: Make sure your plywood is pristine before you start applying the edge banding. No dust bunnies allowed!
- Keep it Dry: Dry plywood is your friend. Avoid moisture to keep the adhesive working its magic.
- Right Width: Stick to edge banding that’s a tad wider than your plywood’s edge for a secure attachment.
If you’re still having a tough time, you can always consider using contact adhesive as a plan B. This stuff is like a bonding superhero and works great on plywood and edge banding. Just slap a thin layer on both, press them together, and voila!
Remember, these tips are your handy-dandy DIY guide, but when in doubt, always refer to the manufacturer’s instructions for the perfect finish.
Why is my iron-on-edge banding not sticking to the laminate?

Having trouble getting that iron-on edge banding to stick to your laminate? No worries, let’s break it down in simple terms to make sure you get it right:
Heat Things Start by cranking up your iron to the hottest setting. It’s all about the heat activating that adhesive magic. Give it a good 5 minutes to get nice and toasty.
Check the Edge: Make sure your edge banding isn’t feeling too cold. It should be at room temperature, not chilled. Cold banding means the glue won’t play nice.
Clean and Dry: Your laminate surface needs to be spotless and dry as a bone. Dust and oil are your enemies here. They’ll mess with the glue’s plans.
Apply Evenly: When you’re slapping on that edge banding, do it evenly. No gaps, no bubbles. Unevenness is the enemy of a strong bond.
Trim Right: Once it’s stuck on there, trim the excess flush with the laminate. A sharp knife or a snazzy edge trimmer should do the trick.
Get Down and Bond: Press that banding down hard with a roller or a cloth. You want that bond to be as tight as a drum.
If you’re still having a tough time, maybe consider trying some other options like pre-glued edge banding or contact cement. These might be your best bet in tricky situations.
Why is my iron-on-edge banding not sticking to melamine?

There are a few reasons why your iron-on edge banding might not stick quite right to melamine.
First things first, make sure that your edge banding’s glue is nice and toasty. Check that your iron is set at the right temperature for the type of banding you’re using.
You can even give your melamine a little warm-up with a heat gun before you slap on that banding. It’s all about creating the perfect bonding conditions.
Next up, don’t be shy about the pressure! When you’re ironing on that edge banding, put some muscle into it. You can use tools like a rubber mallet or even a rolling pin to make sure that adhesive sticks like glue (because it is glue!).
Now, cleanliness is key, especially with melamine being all non-porous and picky. Give your melamine a good scrub-down before you apply the banding.
Get rid of any dust, grease, or whatever else is hanging out there with a damp cloth, so you’ve got a smooth surface to work with.
And don’t forget to keep things warm. Melamine is a bit of a heat lover, so make sure that the surface is cozy before you stick on that banding. You can use a heat gun or just work in a warm space to help that bonding process along.
Some extra tips for nailing the iron-on edge banding game:
- Cut that banding to the right size with a sharp utility knife.
- Peel off the backing paper from the banding.
- Stick the banding on the melamine, and glue side down.
- Press down evenly with the iron, move it smoothly, and keep it steady.
- Hold the iron on each spot for about 2-3 seconds to make sure it’s all good and stuck.
- Trim off any extra banding with your trusty utility knife for that clean finish.
If you’re still having trouble getting that edge banding to cozy up to melamine, you might want to consider playing around with other adhesives like contact cement or wood glue. Sometimes, a little experimentation can work wonders for your specific project.
Important FAQs
Iron-on edge banding is a thin strip of material, such as wood veneer, PVC, or ABS, that is applied to the edges of wood or other surfaces to provide a finished look and protection. It has adhesive on one side, which is activated by heat from an iron, creating a bond with the surface.
There are various types of materials used for iron-on edge banding, including wood veneer, PVC (Polyvinyl Chloride), PP (Polypropylene), and ABS (Acrylonitrile Butadiene Styrene). Each material has its unique properties and applications.
Yes, iron-on edge banding can be applied to a variety of surfaces, including wood, MDF, plywood, particleboard, melamine, laminate, acrylic, ABS, PVC, glass, and metal. However, proper surface preparation is essential to ensure a strong bond.
Common reasons for poor adhesion include using the wrong heat setting on the iron, applying the banding to a dirty or uneven surface, using old or damaged edge banding, and not applying enough pressure during the bonding process.
To troubleshoot adhesion issues, ensure the surface is clean and dry, use the correct heat setting on the iron, apply even pressure during bonding, follow manufacturer-recommended time guidelines, and check if the banding fits the edge properly.
Final Thoughts
Well done! You’ve just cracked the code to becoming an iron-on edge banding pro. Armed with this know-how, your woodworking projects are about to level up in terms of quality and endurance.
Just keep in mind, whether you’re working your magic with wood veneer, PVC, PP, ABS, or any other edge banding wizardry, the name of the game is prep and precision. Prioritize clean surfaces, pick the right adhesive, and handle with TLC.
But don’t fret if you hit a snag along the way. I’ve got you covered with some nifty troubleshooting tricks to ensure your edge banding sticks like a champ.
From adjusting the heat to tackling tricky curves and dealing with environmental quirks, you’re ready to face any challenge head-on.
Will Edge Banding Stick to Metal? A Comprehensive Guide 2023
“Having unlocked the secrets of iron-on edge banding, dive into ‘Will Edge Banding Stick to Metal? A Comprehensive Guide 2023’ for more woodworking wisdom.”